

The Drive from Jason Teale on Vimeo.
For the past few weeks I have been experimenting with time lapse photography. You have known that I was working on something from the different posts about intervalometers and whatnot. However, the biggest challenge that I found was trying to cut-through the technical jargon and create a beautiful product for an entry into this years 10 magazine Korea Awaits video contest.
The biggest problem that I found was either the tutorials were too simple “After taking a series of photos use quicktime pro” to the overly confusing and too technical for even me to understand. However, through trial and error I did come up and find some ways to create beautiful (or so I think) videos in a relative easy way.
When I first started I did it the hard way. I tried a few ways to edit and on left me hitting the “enter key” like a robot for nearly 2 hours. Others were just plain hard to use and left mediocre results. So with that in mind, lets break down what I did.
Equipment and Software:
You are going to need a few things to make this project happen but most of which you should already have in your bag of tricks:
- Intervalometer
- Tripod (a must… don’t even think about hand holding)
- Adobe Bridge/Camera RAW
- Quicktime Pro
- Video Editing software like iMovie or Movie Maker for PC
- LRTimelapse *optional
The Set Up
You are going to need a bit of time for these things. If you are wondering about how much I found a great free app called Time Lapse Helper that allows you to correctly calculate how much time, how many photos, the interval and how long the clip will last. Why this is important is that when you are taking a scene that is important and you have no idea how long it will last or what your interval should be then when you get the results back home they could be disappointing.
The average video is about 24 frames per second but you can play around with it a bit. Sometimes 30 frames per second looks better, so this little app will help you get the settings right. Once you get your shot in place, take a shot the way you normally do and keep shooting until you get it right. Then copy those settings in manual mode on your camera and lock it down. The reason is that should anything change you will get a noticeable flicker because the camera is adjusting itself each frame. This is particularly annoying to watch and also makes your video look jumpy.
OK, so your camera is set, your used the app to get the right settings for your intervalometer and now you just sit back and click away…. Hold on. The last step is to make sure you are shooting in large JPEG and have enough battery life. This are crucial to your project especially if it is a longer set like a sunrise or sunset.
Post Processing
This is where I hope you will find this post useful. To give you a hint as to what you are about to work with, for a minute of video you are looking at 1440 images (for 24 fps) at an interval 5 sec. (example) = about 2 hours of shooting. That is a lot to process. As I said when I first started this project I created a photoshop action but missed the saving step and ended up hitting enter about 1000 times. I searched for a few days to find a better solution. Why? because you need to adjust your photos to make them pop and to correct horizon lines, temp, saturation etc.
Then I found that you can use a little trick via Adobe Bridge. This is the easiest way to process these (I don’t use lightroom, so you may want to check to see if you can do the same thing) images quickly and painlessly.
- Select all the images to process and open them in Camera RAW (look for the little aperture like icon in the top left of the screen)
- Camera RAW will open up with all of your images loaded. Select the first image and get it to where you want it.
- Click the “select all” button.
- Then click “synchronize”
- A pop up will appear and then click on the drop down menu that reads “custom subset” and change it to “Everything”
- Click “OK” and then click “Done” **DO NOT CLICK “OPEN IMAGES”**
Give your computer some time to crunch this and then carry one with the next step which is renaming your files so that Quicktime Pro and make a video with them. Make sure that you have all of the files still selected and then click on tools>batch rename. This should bring up a dialog box. Now for these projects I like to keep things as organized as possible. So I created a file folder for the project then I rename and move the files to that location. Thus you will have a file structure that looks like this Korea Time Lapse>Driving>1.jpeg,2.jpeg, etc.
If you are renaming a lot of files give notice to the “New File Names” area as you will want that to be set to”image sequence” “1” “four digits” Bridge likes to save the last number it finished with (which is kind of annoying), so be sure to set the middle field to 1 . Also keep in mind how many photos you have and set the number of digits correctly. Usually 4 is good enough unless you took over 9999 photos for 1 sequence.
Once you renamed everything you can then assemble the rough video in Quicktime by selecting the “Image Sequence” function. In a few second a movie should appear and then just export it to the file containing all the images in that movie. Then finally you can edit the movie in movie maker or imovie.
Here is where you can assemble the clips and add in your music. If you need a source of royalty free music here is a good link that has tons of free music (legal) to use for your movies. Also for a really simple and multiple platform workflow check out this LRTimelapse software and the workflow description. The explanation and workflow description is a must read before you start editing. Watch the videos and support if you can because this cool software is FREE. This site saved me so much time and effort! Thank you Gunther Wegner!!
A few tips that I found while creating some things are:
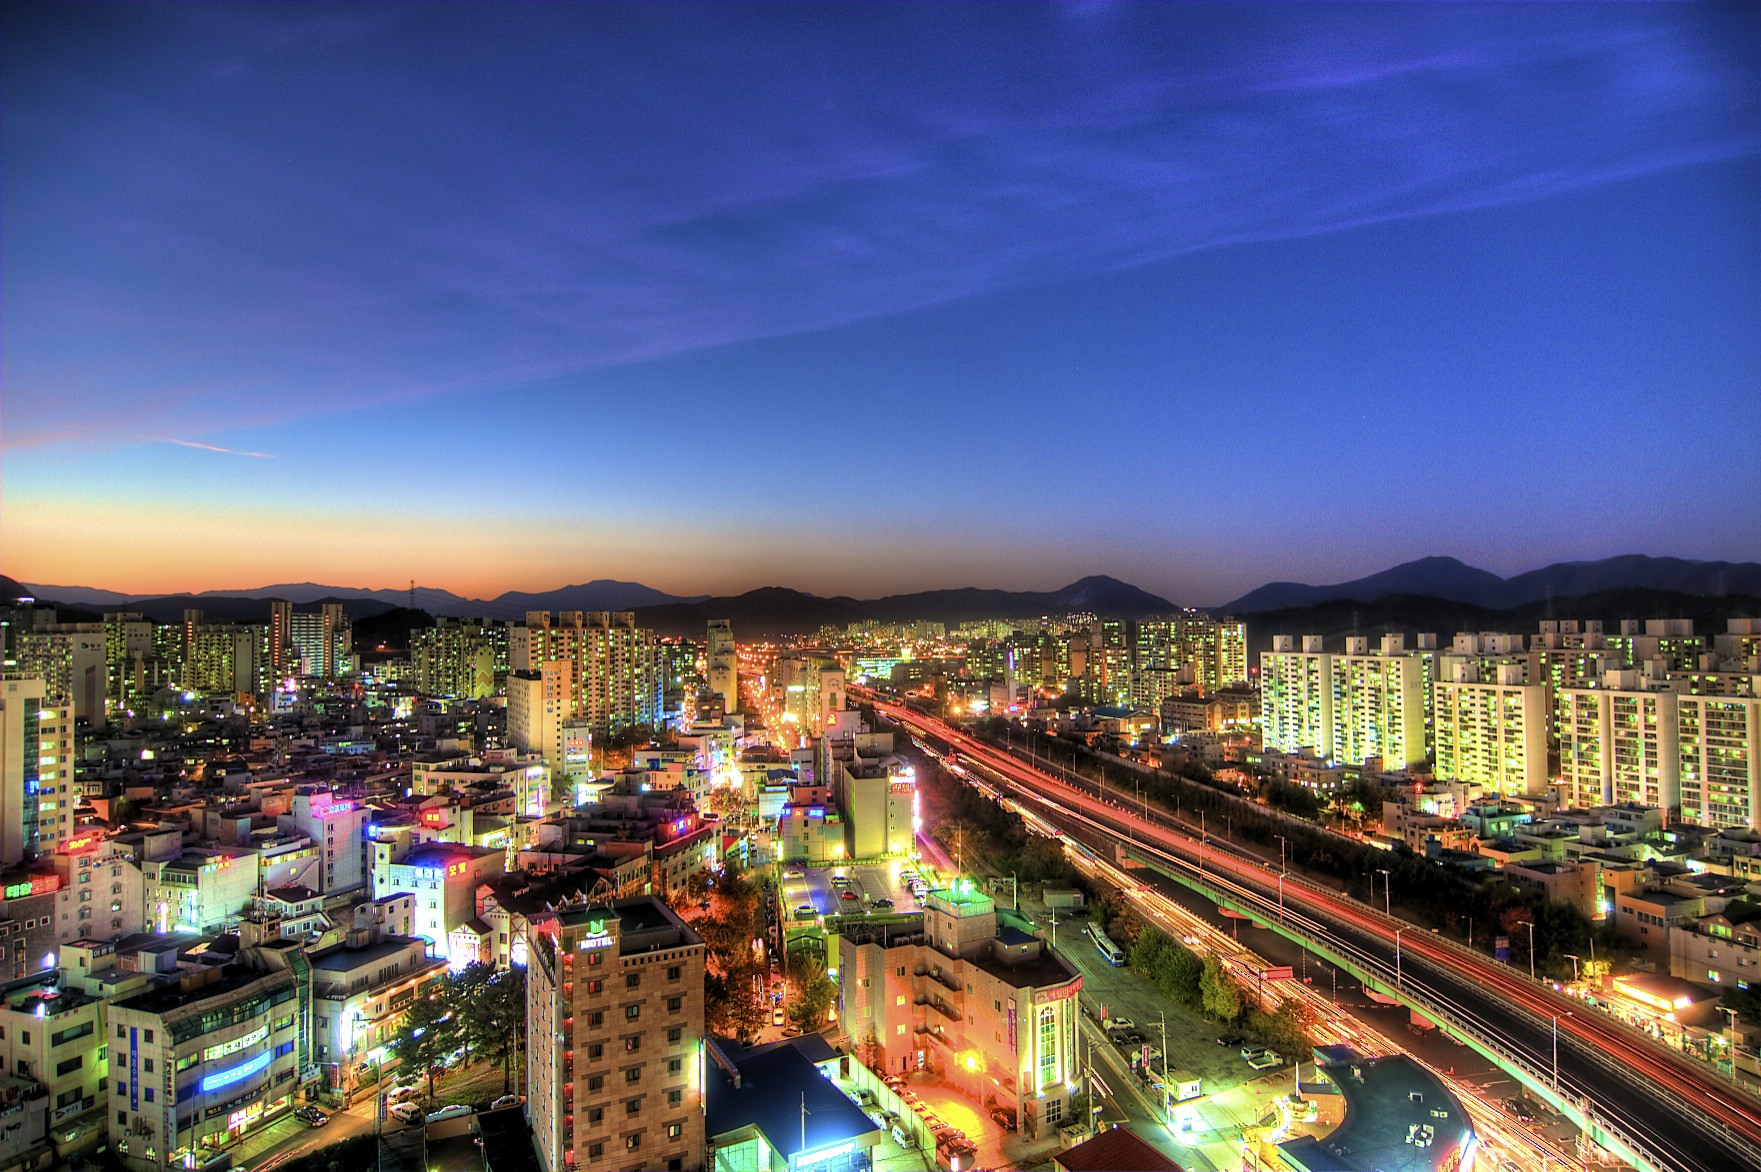
Keep clips short: I spent about an hour standing with my very unenthusiastic girlfriend taking shots of a subway station. I got a nice long clip and realized that I didn’t need a full minute of people walking. When I started watching some amazing time lapse videos I realized that most of the segments were around 5 to 10 seconds. Even the most epic sequences where not more than 15 seconds. So keep things moving and keep the segments down to around 5 to 10 seconds.
Movement: When you choose a stationary object like a building to shoot or even a street, capture the movement. If you are focusing on the building, chose a day where there are tons of clouds in the sky and set your intervals to around the 5 second mark. I made the mistake of choosing to shoot on some days that had no clouds and the footage was ok but boring.
Creative Angles: People have seen cars rush past and people get off a subway so you want to choose interesting angles that show off what movement and light changes/painting can do. Especially if you are showing traffic, get up high and give the whole scene. Try to remember to fill the frame, that will make your video more interesting.
Music: Be careful how you use your music. We all want to put our favorite music in our projects but music rights just like photos can be tricky. This site I mentioned has tons of great music to fit your movie and it is free. What I like is the “search by feel” option. It has tons of great categories that I am sure will fit your movie.
The Sky from Jason Teale on Vimeo.
Sean
Using lightroom its easy to create an export pre-set – I’ve got one set up there.
I would also recommend setting your white balance to something other than auto because if the light changes you’ll end up with some weird effects/flickers.
Another thing that was suggested to me was to get some panning in time-lapse. If you’ve got the equipment for it great, if not then you can do a faux pan using video editing software and key frames.
I use Premier Pro CS5 for my time lapse and it’s actually quite easy to do if you’ve already gotten over the adobe learning curve. If not, googling a few tutorials should help there.
I really need to find some time to do another time-lapse video. Guess I should start scouting out locations in Toronto now that I am no longer in Seoul.
Jason Teale
Thanks for the tips Sean. Any tips on the exporting of the video? My biggest challenge is that when I export the video quality is really poor. I have no idea why as I have all the export options set to above “youtube quality”
Sean
Jason it’s been a while since I did this and can’t remember my settings in Premier Pro – but definitely make sure you use the h.264 codec and set your bit rate at about 5000 if you’re exporting to 1080, 4000 would probably be good enough for 720.